
Here is what I did....
Materials needed:
• lots and lots of felt (large pieces for the main stocking part and scraps for details)
• sewing supplies
• glue (for those tiny pieces you just can't sew or for all of the details if you want)
 |
| My crew of monstar stockings! |
 |
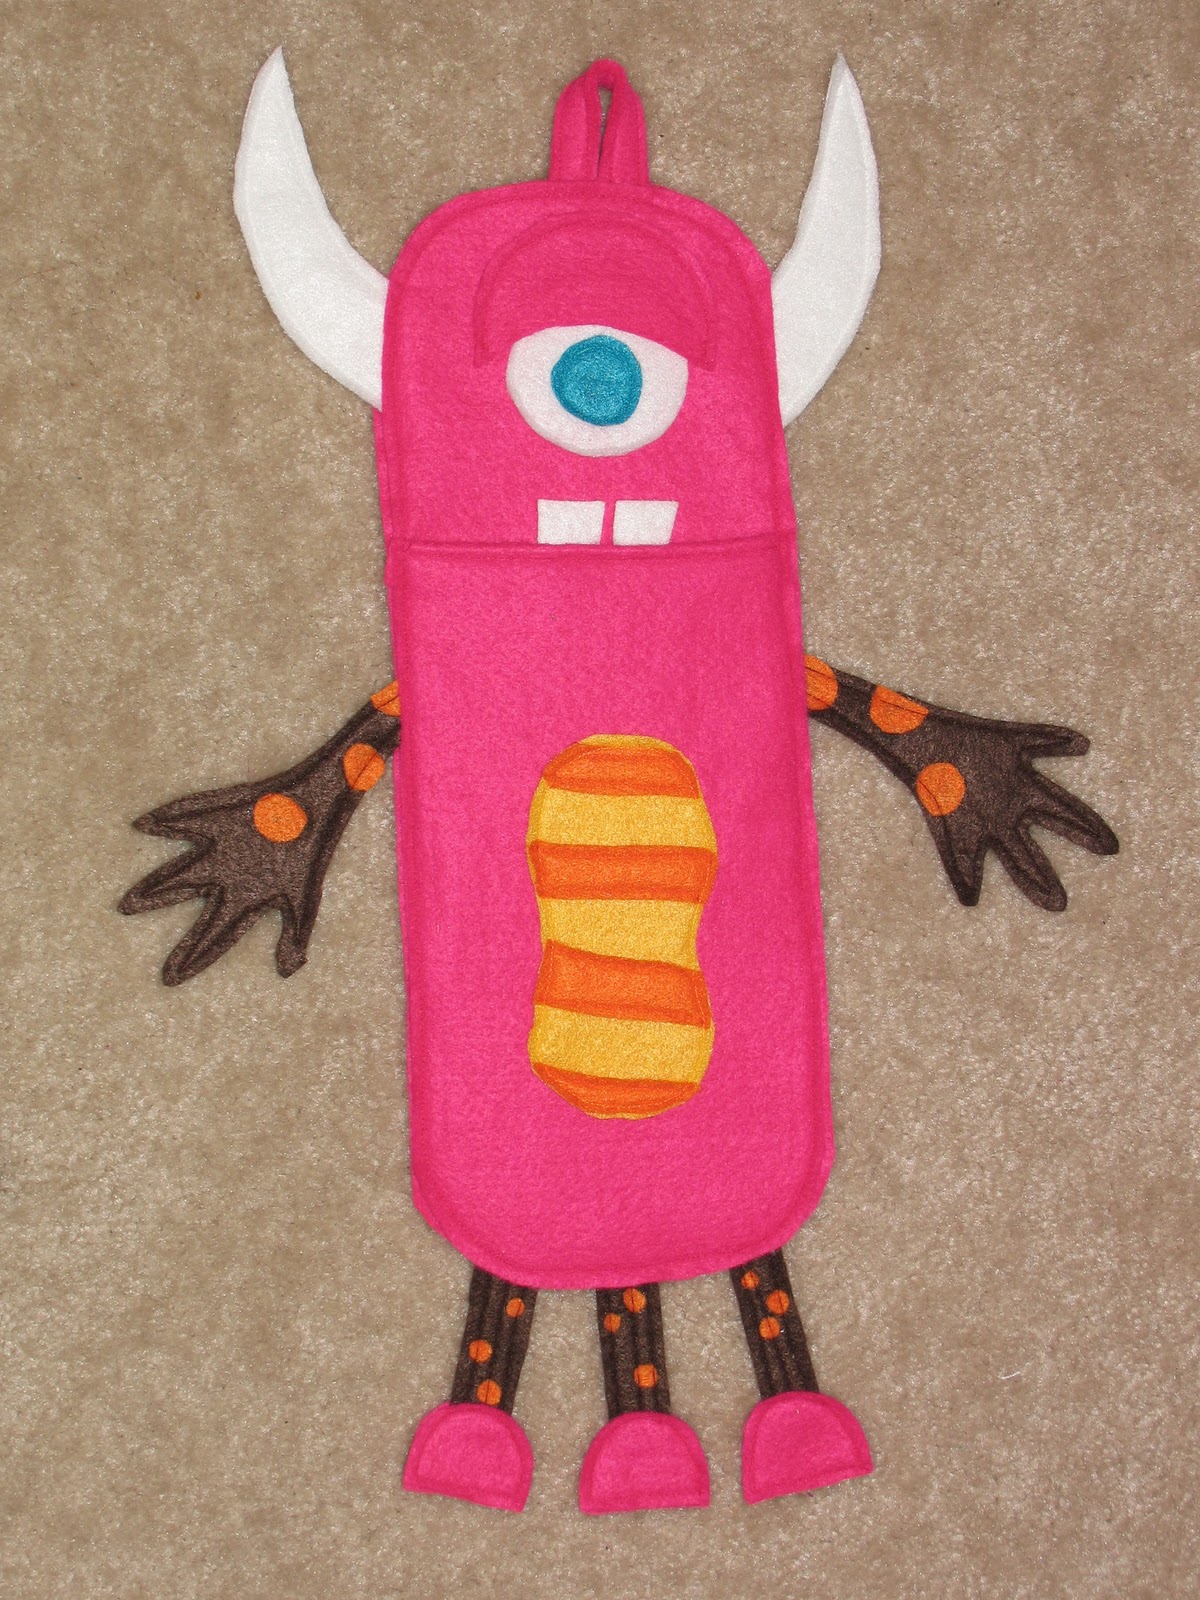
| Me as a monstar (all crazy like :) |
 |
| Pocket for stuffing yummy treats!! |
 |
| My husband as a monstar (he's a bit of a grinch :) |
 |
| Pocket detail |
 |
| AJ (our 8 month old daughter) as a monstar (note the teeth- though now she has 4! :) |
 |
| Pocket detail |
 |
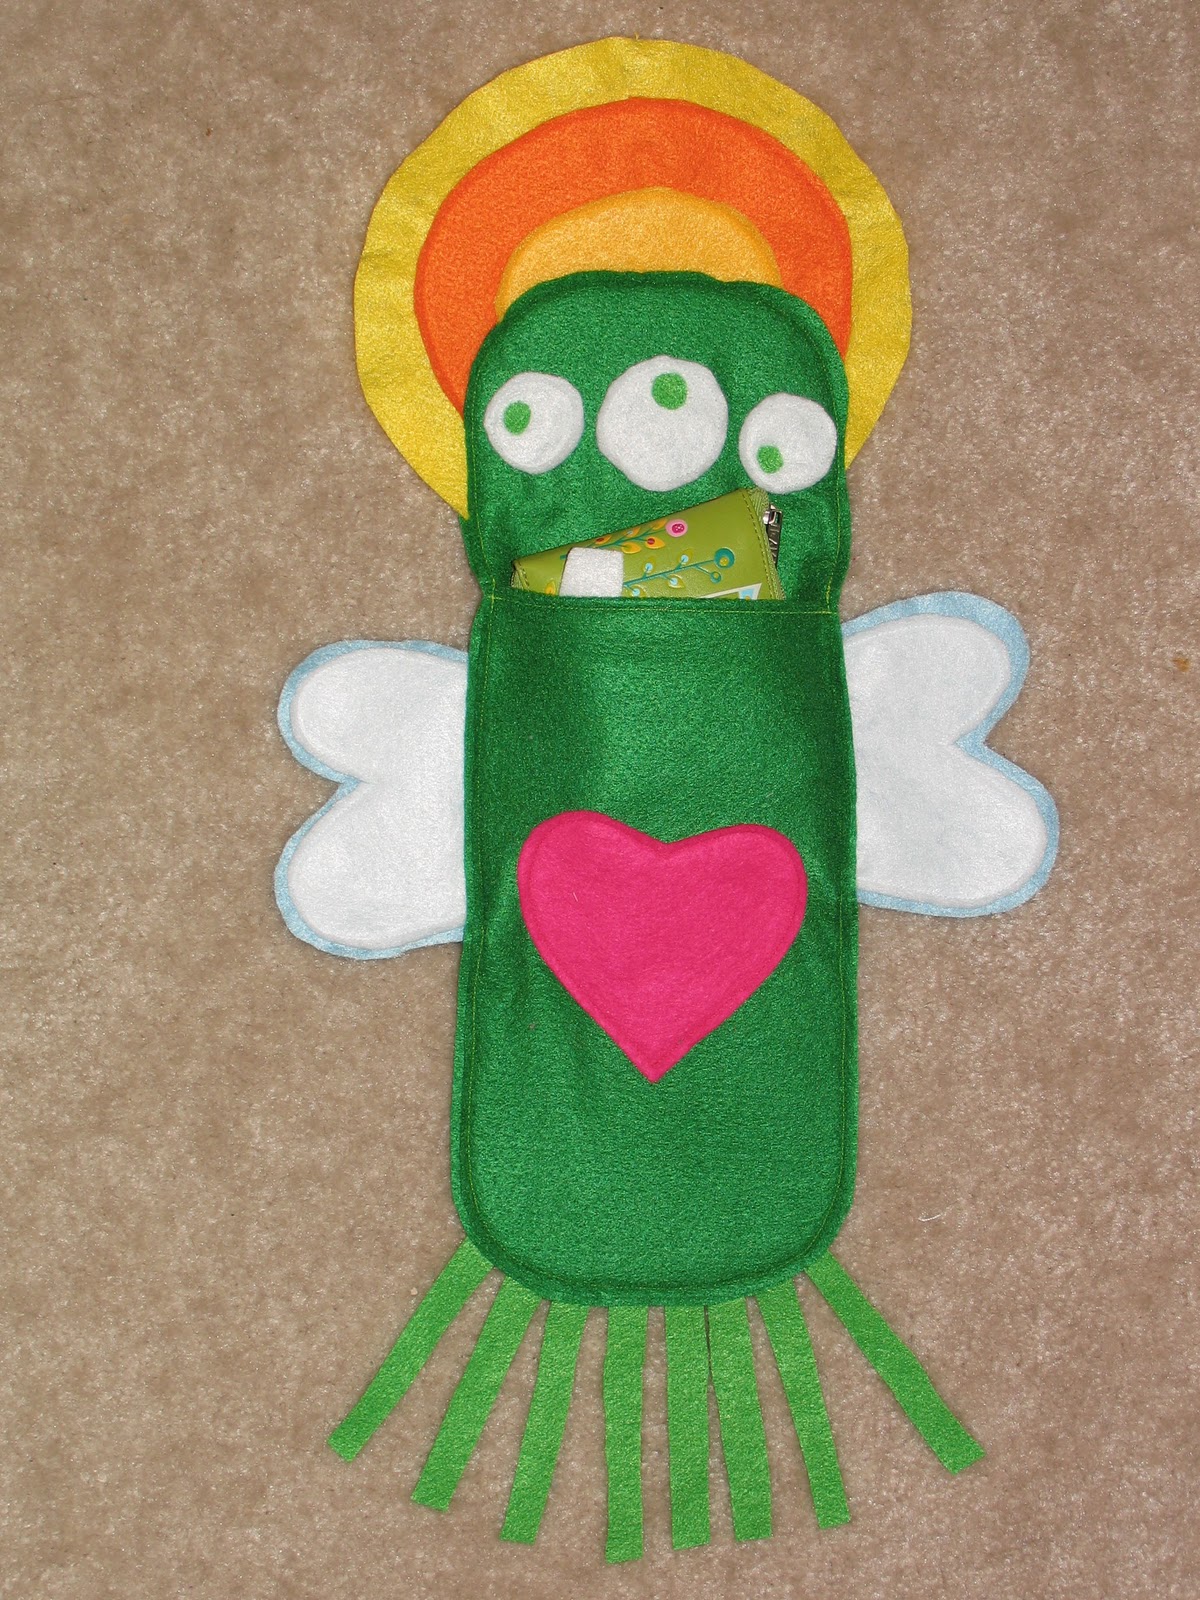
| Ethan our first child (he was still born but remains a part of our lives) as a monstar |
 |
| Pocket detail |
To make these I simply cut out 3 large rectangles with rounded corners (again, I am not a measurer so I just said this looks good and cut out my pieces). On one of the rectangles I cut off the top and made it the mouth and pocket for stuffing.
To create the loop to hang it from I cut out 2 small, long rectangles and stitched them together (to make it thick and stronger) and then folded it and touched the 2 raw edges together and pinned it in between the front and back panels at the top
Then the fun part...decorate...create your monster add all the details and when you like your monstar the way you like it figure out what needs to be sewn first and start sewing!!! *note to make it sturdier I cut out 2 of each body part that would hang off the main rectangle base and stitched them together but only glued or stitched details to the front.
For me, I stitched down the details on arms, hair, feet, ect... or glued them down if they were too small (and waited for the glue to dry before stitching anything to them). Then I took the mouth pocket part and I folded over the edge and pinned it and then added my tongue or teeth where I wanted them and pinned them then stitched straight across it (stitching showing). Then I added the tummy detail sewing it to the pocket part only. Then for the wings I stitched a line down the back piece. Next I stitched down the eyes/ and face detail. Then I took any body part that would hang out of the felt (arms, legs, tentacles, horns, hair) and placed them between the front and back panels and then placed the pocket part onto the front and stitched around the perimeter of the main rectangles. I added shoes and stitched around the outside of it.
It took me a while to figure out the best order to sew it all in (esp because I wanted to us matching thread for the body parts so it took A LOT of switching thread and I tried to minimize when possible!) but once I did I was so glad I did it. I would have had to leave out a lot of things had I not planned it a bit.
Now they are hung and stuffed and ready for Christmas morning (which will be tomorrow for us since we are going to be traveling for the holidays but still wanted to have AJs first "Christmas" be in our new house!)
No comments:
Post a Comment