
The latest project I have been working on was from a blog that I read. (It's a great blog! You should check it out!) Anyway, I decided I would make this for my niece for Christmas since it was just so cute and so easy!! I made a few changes to mine (as you can tell) but her way would have been way easier and is super cute! But I just had too much fun and found myself unable to stop (and still think I could add more scenes each birthday or Christmas or she could add her own!)
Materials needed:
• lots of felt and in several colors!!!
• 2 larger rectangles of felt for the outside and inside panels (I didn't measure mine I just cut it out)
• scrap of chalkboard fabric (optional- but totally awesome!!!!)
• puffy paint
• button
• scrap of elastic
• glue (white glue that dries clear works well here)
• sewing supplies
• small googly eyes (optional)
• hot glue gun (optional- I used it to glue the flower together on the front)
• scraps of cotton fabric (I made the handles and the a's on the front out of this material)
• double sided fusing (optional -used for applying cotton fabric letters to felt)
 |
| Everything closed up and ready to travel |
 |
| Finished board |
 |
| Pocket on finished board |
 |
| Empty board with play pieces |
 |
| Play pieces |
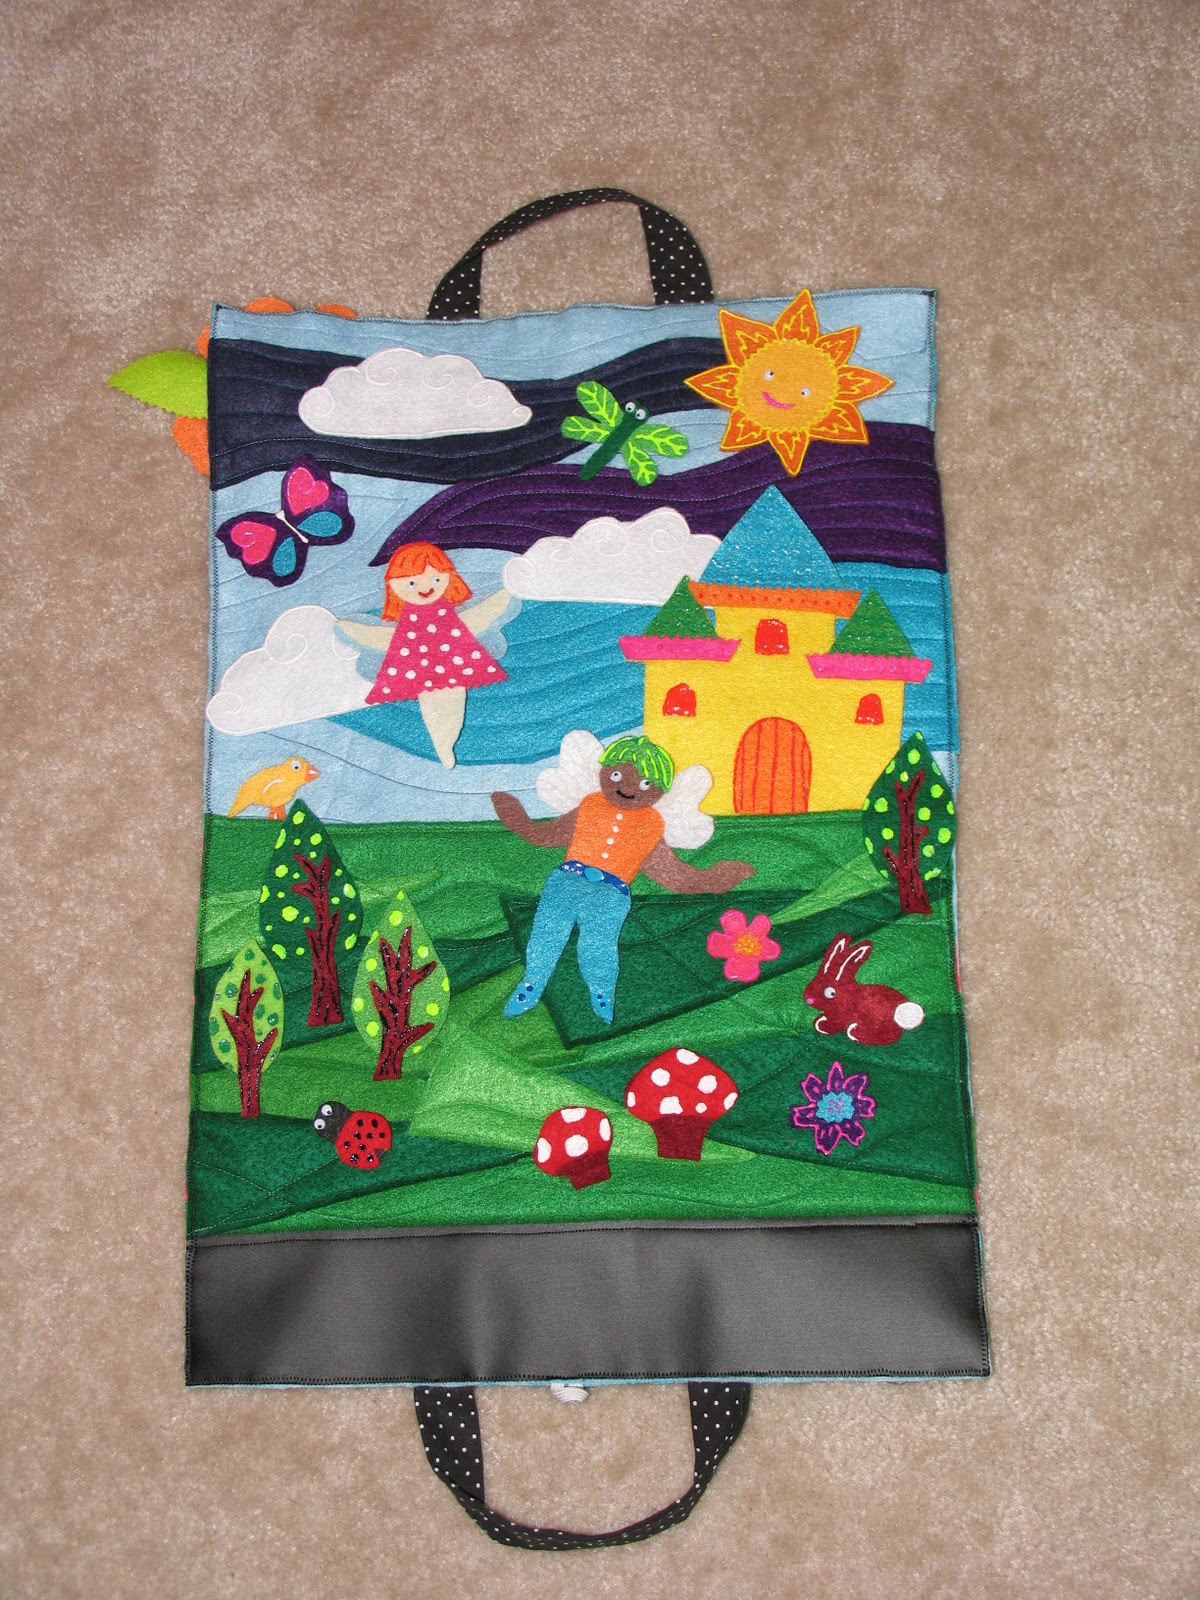 |
| Sample of finished scene |
 |
| Finished scene with title on chalkboard fabric |
 |
| Close up detail of chalkboard fabric |
To start this project I cut out a large rectangle out of 2 big pieces of felt. I didn't measure- not my style :) One of the rectangles is for the outside and will be the front and back when closed. One rectangle is for the main inside panel.
Next I made a pocket panel. I was going to just have a solid green piece for the grass but low and behold I did not have enough of one green so I had to get a solid piece of felt and placed triangles of "grass" around it and quilted it. I loved how it turned out! I also added a long rectangle of chalkboard fabric (mainly because I had some extra and I am in LOVE with it!!!) so she could write whatever she wanted there.
The next step was to make my sky more funky too. I cut out some "wind" shapes and quilted it as well.
Next I worked on the detail for the front. Here I just cut out her name (nothing special just free handed it) and then took a piece of cotton fabric and ironed on the double sided fusing to it). I drew an a on a piece of paper cut it out flipped it and traced it on the paper side of the fusing then cut out both a's and ironed them on to the front (after dry fitting it and figuring out how I wanted it to lay it out). Then I took the other felt letters of her name pinned them down and just sewed a line down the middle (also sewing the cotton letters too).
For the handles I used the same cotton fabric and cut out 2 long rectangles the same size and then sewed them right sides together and flipped them, ironed them, and pinned them in between the inside and outside panels. I also took my little bit of elastic and placed it in the center between the inside and outside panels on one side.
Then I pinned it all together. The inside and outside panels as well as the pocket. Then I sewed it up on all 4 sides with a zigzag stitch and then trimmed the edges...you could use a Serger but sadly I don't have one :(
For the flower on the front I cut out petal shapes for the petals one larger size and one smaller sized. I then glued the center bottom part and pinched it together (being careful of hot glue!!!) and glued them all together large ones first and then smaller ones on top. For the leaves I cut out 2 leaf shapes and added a dot of hot glue to the center bottom and pinched. For the center part of the flower I cut out a circle using my pinking shears and then sliced little lines toward the center (but keeping the center solid). Then I folded it onto itself added dabs of hot glue and attached it to the center of the flower. Then I hot glued it on.
To finish off the carrier/background I added the button to the front panel where her name was (opposite the side with the elastic) using the elastic as my guide for placement.
To do the play pieces I just came up with things I wanted to do, such as fairies, castle, rainbow, bugs, animals, nature things...then I cut out basic shapes to create them (all of it was free hand but I am sure you could look up silhouette pictures if you wanted to trace them). I glued the pieces together and let them dry. For detail I added puffy pen lines and dots and such (even used glitter puffy paint for the wings of the fairies). Then for the eyes I used small googly eyes (because I always love a reason to use googly eyes :)
Once all of your pieces are done and dry place them in the pocket, add a pack of chalk (maybe a chalk eraser) and it is the perfect present for a little girl.
When my little lady gets older I think I want to make her a monstar making one...complete with eyes, mouths, warts, whatever :)
No comments:
Post a Comment